Possibly the best way to increase your watercolor skills quickly is to attend a watercolor workshop with a master painter. Standing just behind them, watching and listening as they explain their choice of subject, the composition, the initial sketch, the use of the brush to apply paint, and the washes as they go on the paper — there’s nothing like being there in person.
I drove to Long Beach, Washington, last week to attend Eric Wiegardt’s watercolor workshop July 10-13, 2023. I camped at Cape Disappointment State Park, which kept my expenses to a minimum. There were eleven students in the workshop, so everyone got plenty of attention from Eric. He was generous in his time with each of us, giving suggestions and a critique if we wanted it.
The first day we met at the conference room of the Breakers Motel in Long Beach for an introduction to the workshop. I was a little nervous entering a room of strangers, but I quickly felt at home when I met several of the painters I recognized from Eric’s weekly Zoom classes. Eric’s wife, Ann, warmed up the room with her smile and a plate of homemade blueberry muffins. After a short talk by Eric, we piled into our cars and drove to Waikiki Beach at Cape Disappointment State Park. The view encompasses dramatic cliffs looking out to sea, as well as the resolute lighthouse on top of the cliffs.
Eric began with some basics. It’s important to squeeze out fresh watercolor pigment in your palette so you have moist pigment to draw from. He keeps his easel at an angle to let the paint flow down, and he also keeps his palette at an angle so it cleans itself. He wets his brush, then picks up some pigment from the well and lays it on the palette. Then he picks one or two more colors and does the same. The colors are still separate. Then he takes his brush and runs it through the colors in an ‘S’ motion — just once — and applies it to the paper. This results in a juicy wash on the paper with the colors running together, not gray or muddy, but still vibrant.
He emphasized the importance of values. Usually the sky will be the lightest value, the ground or water will be the next lightest, and vertical objects like buildings, trees, and hills will be the darkest values. If you get the values right, the painting will look right. He made a quick value sketch using a thick pencil on white paper. Keep the values to a minimum, no more than five or six. He starts with three values, light, middle, and dark, and then adds a couple more if needed. In this painting with sky and sea, it’s important to make the sea a slightly darker value than the sky.
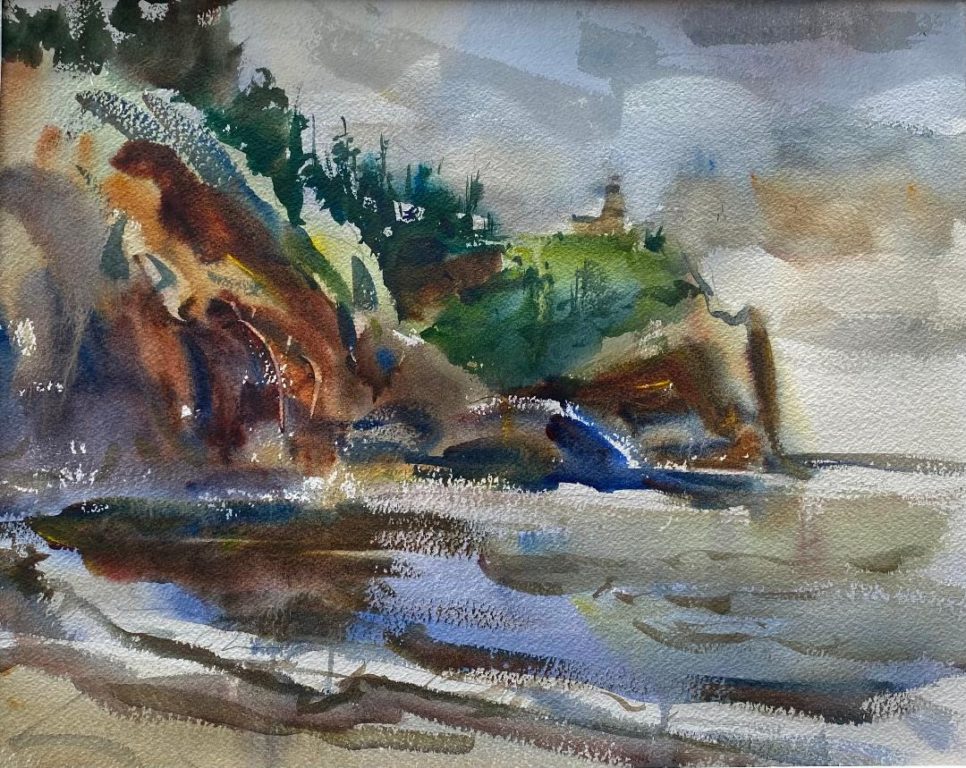
After quickly sketching the scene on his watercolor paper, he began with a big juicy wash of color in the sky. Using a big brush, he quickly introduced blues and browns. The he moved down to the water and did the same wash, slightly darker. He doesn’t overstroke the washes, but he lays them down and leaves them. This produces a fresh clean look to the painting.
After laying paint on the paper, he rinses the brush off and grabs new fresh color from the palette so that his colors don’t become muddy. Because of this, his paintings are famous for their rich vibrant colors.
Next he modeled the cliffs. He spent some time with his palette, picking up four or five colors with his brush, keeping them separate on the big mop brush. With this loaded brush, he pushed it into the cliff area, producing a variety of colors and shapes. He used plenty of water so that drips ran down the paper. He ignored them, explaining that they’d be picked up later. To finish the cliffs he added dark colors, especially at the bottom, to make them look solidly grounded.
He added some dark colors for the water and the sand below the cliffs so that the shapes weren’t separated. Everything ran together. Using a mop brush with splayed bristles, he dashed in a row of trees along the top of the cliffs. The outside edge of the trees is the important thing to focus on, because that’s what defines them as trees.
He painted the lighthouse, taking care to give it a darker value than the sky. Although the lighthouse is white, it’s still darker than the sky, so it needs to be more of a gray color.
Then he began making adjustments to the values of the painting. He made the water a bit darker, then he added some clouds into the sky to lead the eye downward. The clouds ran right into the trees and merged with the green pigment a little. He added some details, like tree trunks and ripples in the water. Then it was done.
We set up our easels and painted the same scene. I hadn’t listened carefully enough, and my painting was a mess. My cliffs were a big muddy disaster and my water was a gloppy mess.

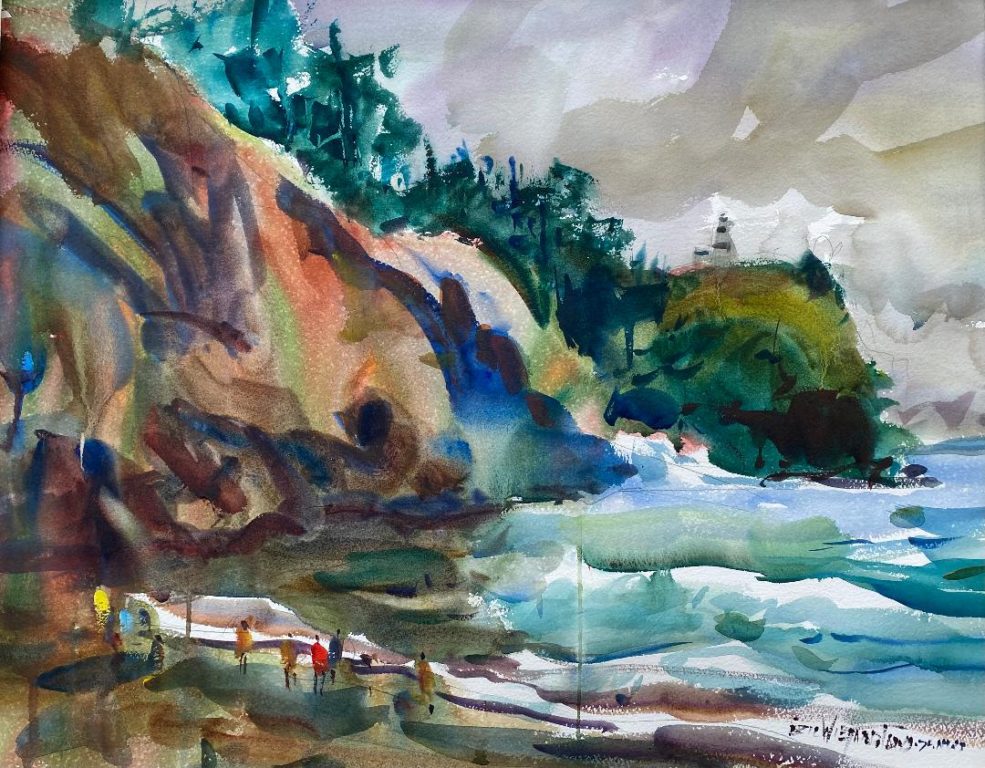
After eating lunch, Eric painted the same scene, but this time he emphasized the distant cliffs and added figures on the beach. You can see how lively his painting is.

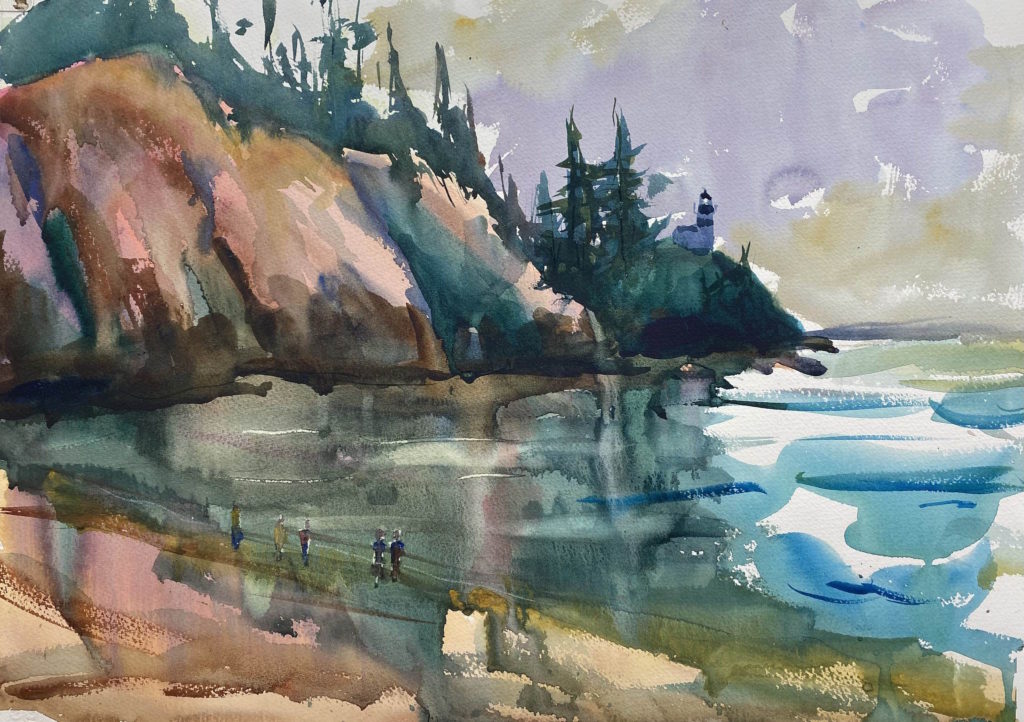
My second painting was much more successful. I was careful not to let the cliffs get muddy this time, and I added darks to the bottom of the cliff ,and the far cliff especially, to make them look more solid. The water below the cliffs turned into a mess, but that’s not too distracting. Eric commented that it almost turned into a two-color painting, pink and green, which I hadn’t noticed. He also pointed out that the light portion of the water is confined to a box area and I could have lifted out some light streaks to the left.
But all in all I was pretty happy with my second watercolor. I felt I had learned a tremendous amount and I was eager to try again the next day.
The ways that the images blend, allow for lots of room for the imagination.
Thanks! That’s the goal, although it can be hard to make it happen.
There’s no substitute for learning from a master. Someday the crowds will be standing behind you.
Thanks, Warren. I need a little more time with the master!